- 前言
- 一、代码
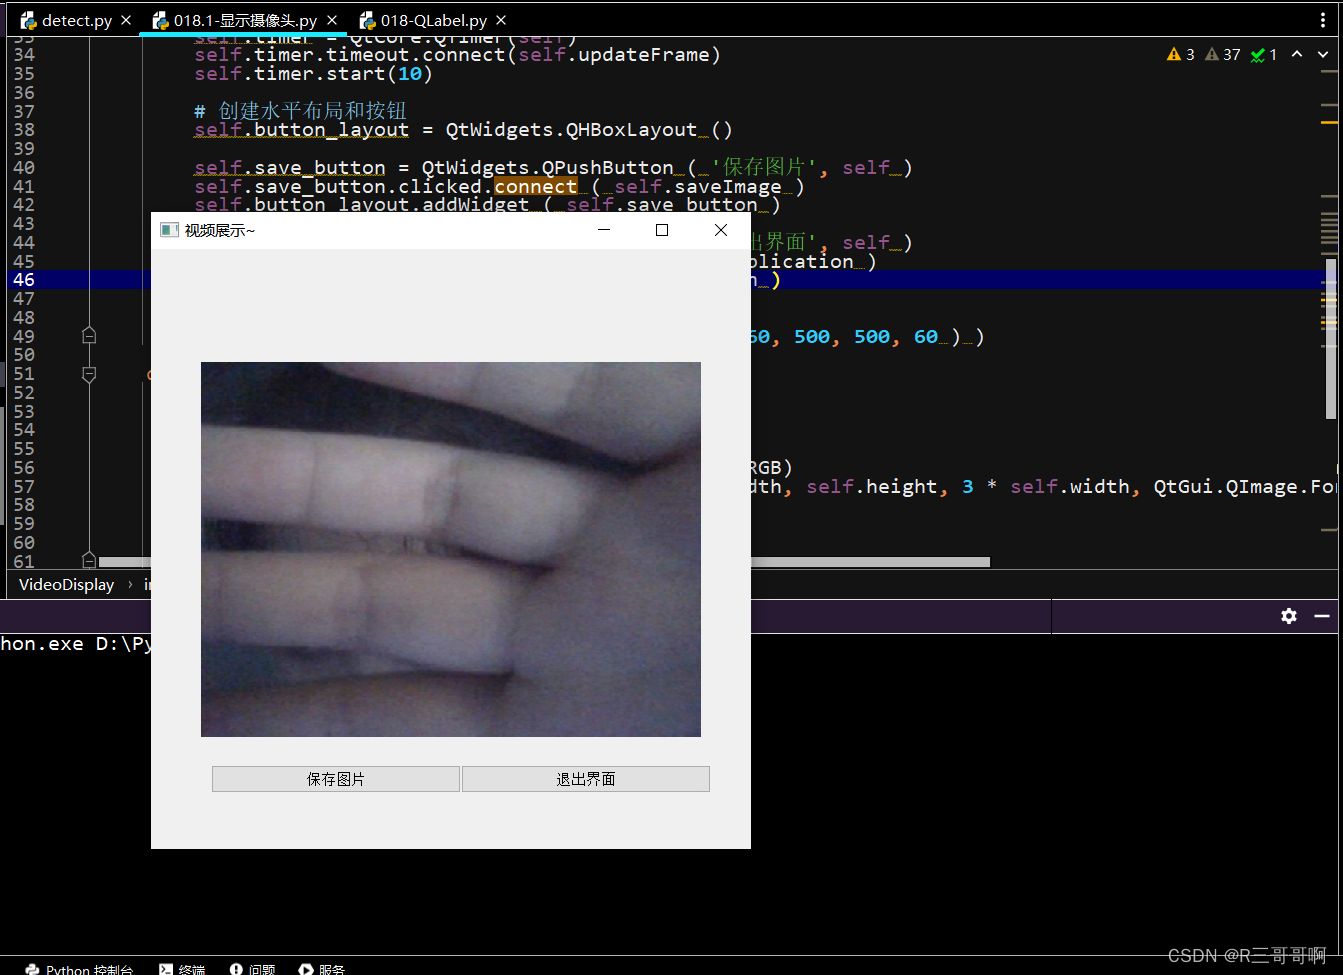
- 二、运行结果
- 总结
前言
一、代码
'''
#Author :susocool
#Creattime:2024/5/22
#FileName:018.1-显示摄像头
#Description:
'''
import sys
from PyQt5 import QtWidgets, QtGui, QtCore
from PyQt5.QtWidgets import QHBoxLayout
import cv2
import os
class VideoDisplay(QtWidgets.QWidget):
    def __init__(self):
        super().__init__()
        self.initUI()
    def initUI(self):
        self.setWindowTitle("视频展示~")
        self.setGeometry(100, 100, 600, 600)
        self.label = QtWidgets.QLabel(self)
        self.label.setGeometry(QtCore.QRect(50, 50, 500, 500))
        self.video = cv2.VideoCapture(0)
        self.width = int(self.video.get(cv2.CAP_PROP_FRAME_WIDTH))
        self.height = int(self.video.get(cv2.CAP_PROP_FRAME_HEIGHT))
        self.ratio1 = self.width / 500
        self.ratio2 = self.height / 500
        self.ratio = max(self.ratio1, self.ratio2)
        self.timer = QtCore.QTimer(self)
        self.timer.timeout.connect(self.updateFrame)
        self.timer.start(10)
        # 创建水平布局和按钮
        self.button_layout = QtWidgets.QHBoxLayout ()
        self.save_button = QtWidgets.QPushButton ( '保存图片', self )
        self.save_button.clicked.connect ( self.saveImage )
        self.button_layout.addWidget ( self.save_button )
        self.exit_button = QtWidgets.QPushButton ( '退出界面', self )
        self.exit_button.clicked.connect ( self.exitApplication )
        self.button_layout.addWidget ( self.exit_button )
        # 设置按钮布局的位置
        self.button_layout.setGeometry ( QtCore.QRect(60, 500, 500, 60 ) )
    def updateFrame(self):
        ret, frame = self.video.read()
        if not ret:
            return
        frame_rgb = cv2.cvtColor(frame, cv2.COLOR_BGR2RGB)
        picture = QtGui.QImage(frame_rgb.data, self.width, self.height, 3 * self.width, QtGui.QImage.Format_RGB888)
        pixmap = QtGui.QPixmap.fromImage(picture)
        pixmap.setDevicePixelRatio(self.ratio)
        self.label.setPixmap(pixmap)
        self.label.show()
    def saveImage(self):
        ret, frame = self.video.read()
        if not ret:
            return
        file_path, _ = QtWidgets.QFileDialog.getSaveFileName(self, 'Save Image', os.path.expanduser('~'), 'Images (*.png *.jpg *.jpeg)')
        if file_path:
            cv2.imwrite(file_path, frame)
    def exitApplication(self):
        self.video.release()
        self.timer.stop()
        self.close()
if __name__ == "__main__":
    app = QtWidgets.QApplication(sys.argv)
    ex = VideoDisplay()
    ex.show()
    sys.exit(app.exec_())
二、运行结果
--------------------------------------------2024/5/22
总结
这篇文章依旧没有总结
转载请注明来自码农世界,本文标题:《pyqt5-结合opencv展示实时视频纯Demo》
百度分享代码,如果开启HTTPS请参考李洋个人博客


![[工业自动化-1]:PLC架构与工作原理](https://img-blog.csdnimg.cn/ce10a1471ed14382bc58364cf8bd5209.png)


还没有评论,来说两句吧...