😄 19年之后由于某些原因断更了三年,23年重新扬帆起航,推出更多优质博文,希望大家多多支持~
🌷 古之立大事者,不惟有超世之才,亦必有坚忍不拔之志
🎐 个人CSND主页——Micro麦可乐的博客
🐥《Docker实操教程》专栏以最新的Centos版本为基础进行Docker实操教程,入门到实战
🌺《RabbitMQ》本专栏主要介绍使用JAVA开发RabbitMQ的系列教程,从基础知识到项目实战
🌸《设计模式》专栏以实际的生活场景为案例进行讲解,让大家对设计模式有一个更清晰的理解
💕《Jenkins实战》专栏主要介绍Jenkins+Docker+Git+Maven的实战教程,让你快速掌握项目CI/CD,是2024年最新的实战教程
如果文章能够给大家带来一定的帮助!欢迎关注、评论互动~
Spring Boot 整合 spring-boot-starter-mail 实现邮件发送和账户激活
- 前言
- 申请SMTP服务
- 项目初始化
- 配置邮件服务
- 定义操作邮件Service
- 定义用户相关
- 开始测试
- 结语
前言
在我们日常开发中,用户注册后需要对用户进行一个激活,通过邮件激活账户是一种常见的用户验证机制。这里博主将详细介绍如何使用 Spring Boot 实现邮件发送和账户激活功能,并构建一个简单的Spring Boot项目实现代码示例和关键技术点。
申请SMTP服务
这里以QQ邮箱为例,登陆QQ邮箱「设置」 - 「账户」找到SMTP选项,选择开启服务,生成授权码。 博主已经开通过见下图:
官方温馨提醒:为了帐户安全,更改QQ密码以及独立密码会触发授权码过期,需要重新获取新的授权码。
项目初始化
首先,我们需要创建一个具备整合redis、mysql、mail的 Spring Boot 项目。整体 pom.xml 如下:
            org.springframework.boot
            spring-boot-starter-web


            org.springframework.boot
            spring-boot-starter-test
            test


            org.springframework.boot
            spring-boot-starter-mail


            org.springframework.boot
            spring-boot-starter-data-redis


            org.mybatis.spring.boot
            mybatis-spring-boot-starter
            2.3.1


            com.alibaba
            druid-spring-boot-starter
            1.2.16


            com.mysql
            mysql-connector-j
            runtime


            org.projectlombok
            lombok
            true
配置邮件服务
Spring Boot的starter模块提供了自动化配置,在完成了 spring-boot-starter-mail 依赖引入之后,只需要在application.yml中配置相应的属性内容
spring:
    #mail
    mail:
        host: smtp.qq.com
        # 端口号
        port: 587
        # 发送邮件的邮箱地址
        username: xxxxxxxx
        # QQ邮箱获得的授权码
        password: xxxxxxxx
定义操作邮件Service
Spring Boot的starter模块提供了自动化配置,所以在引入了 spring-boot-starter-mail 依赖之后,会根据配置文件中的内容去创建JavaMailSender实例,我们只需要在使用的地方直接@Autowired来引入邮件发送对象
import cn.hutool.core.util.StrUtil;
import lombok.SneakyThrows;
import org.springframework.beans.factory.annotation.Autowired;
import org.springframework.beans.factory.annotation.Value;
import org.springframework.core.io.FileSystemResource;
import org.springframework.mail.javamail.JavaMailSender;
import org.springframework.mail.javamail.MimeMessageHelper;
import org.springframework.stereotype.Service;
import javax.mail.internet.MimeMessage;
import java.io.File;
@Service
public class EmailService {
    @Autowired
    private JavaMailSender mailSender;
    @Value("${spring.mail.username}")
    private String sendFrom;
    /**
     * 不带附件邮件
     * @param subject 主题
     * @param content 内容
     * @param sendTo 定义可变参数 实现邮件发送多个邮箱
     */
    @SneakyThrows(Exception.class)
    public void sendSimpleMail(String subject, String content,String... sendTo) {
        MimeMessage message = mailSender.createMimeMessage();
        MimeMessageHelper messageHelper = new MimeMessageHelper(message, true);
        messageHelper.setFrom(sendFrom);
        messageHelper.setTo(sendTo);
        messageHelper.setSubject(subject);
        messageHelper.setText(content,true);
        mailSender.send(message);
    }
    /**
     * 带附件邮件
     * @param subject 主题
     * @param content 内容
     *
     * @param filePath 附件路径
     * @param sendTo 定义可变参数 实现邮件发送多个邮箱
     */
    @SneakyThrows(Exception.class)
    public void sendAttachmentsMail(String subject, String content,String attachmentName, String filePath, String... sendTo){
        MimeMessage message = mailSender.createMimeMessage();
        MimeMessageHelper messageHelper = new MimeMessageHelper(message, true);
        messageHelper.setFrom(sendFrom);
        messageHelper.setTo(sendTo);
        messageHelper.setSubject(subject);
        messageHelper.setText(content,true);
        //判断附件
        if(StrUtil.isNotBlank(filePath)){
            FileSystemResource file = new FileSystemResource(new File(filePath));
            //没有传递附件名称则默认使用文件名
            attachmentName = StrUtil.isNotBlank(filePath)?attachmentName:filePath.substring(filePath.lastIndexOf(File.separator));
            messageHelper.addAttachment(attachmentName, file);
        }
        mailSender.send(message);
    }
}
定义用户相关
创建一个 User 实体来表示用户信息,并包括一个用于账户激活的字段 code 以及 账户激活状态 enabled
// 根据User类,大家自行创建mysql数据库user表
@Data
public class User {
    private Long id;
    //注册邮箱
    private String email;
    //密码
    private String password;
    //用户激活状态
    private boolean enabled;
    //激活code
    private String code;
}
为了快速实现用户注册和激活,博主就怎么方便怎么来,不写service接口和实现了,直接调用UserMapper
import com.toher.dockertestproject.domain.User;
import org.apache.ibatis.annotations.Insert;
import org.apache.ibatis.annotations.Mapper;
import org.apache.ibatis.annotations.Param;
import org.apache.ibatis.annotations.Select;
@Mapper
public interface UserMapper {
    @Select("select * from user where id = #{id}")
    public User getById(@Param("id") Long id);
    @Select("select * from user where code = #{code}")
    public User getByActivationCode(@Param("code") String code);
    @Insert("insert into user(id, email, password, code)values(#{id}, #{email}, #{password} , #{code})")
    public int insert(User user);
    @Insert("update user set enabled = 1 where id = #{id}")
    public int update(@Param("id") Long id);
}
创建一个控制器处理用户注册和账户激活请求
注册接口会插入用户(生成UUID作为激活code)至数据库
激活接口更新用户激活状态
@RestController
public class UserController {
    @Resource
    private UserMapper userMapper;
    @Resource
    private EmailService emailService;
    @PostMapping("/register")
    public String registerUser(@RequestBody User user) {
        user.setCode(UUID.randomUUID().toString());
        userMapper.insert(user);
        String content = "点击连接激活: " +
                " + user.getCode()+"'>http://localhost:9090/activate?code=" + user.getCode()+"";
        emailService.sendSimpleMail("注册验证" , content, user.getEmail());
        return "注册成功! 请前往邮箱进行激活账户";
    }
    @GetMapping("/activate")
    public String activateUser(@RequestParam String code) {
        User user = userMapper.getByActivationCode(code);
        if (user != null) {
            //更新用户激活状态
            userMapper.update(user.getId());
            return "账户激活成功!";
        } else {
            return "无效的激活码!";
        }
    }
}
开始测试
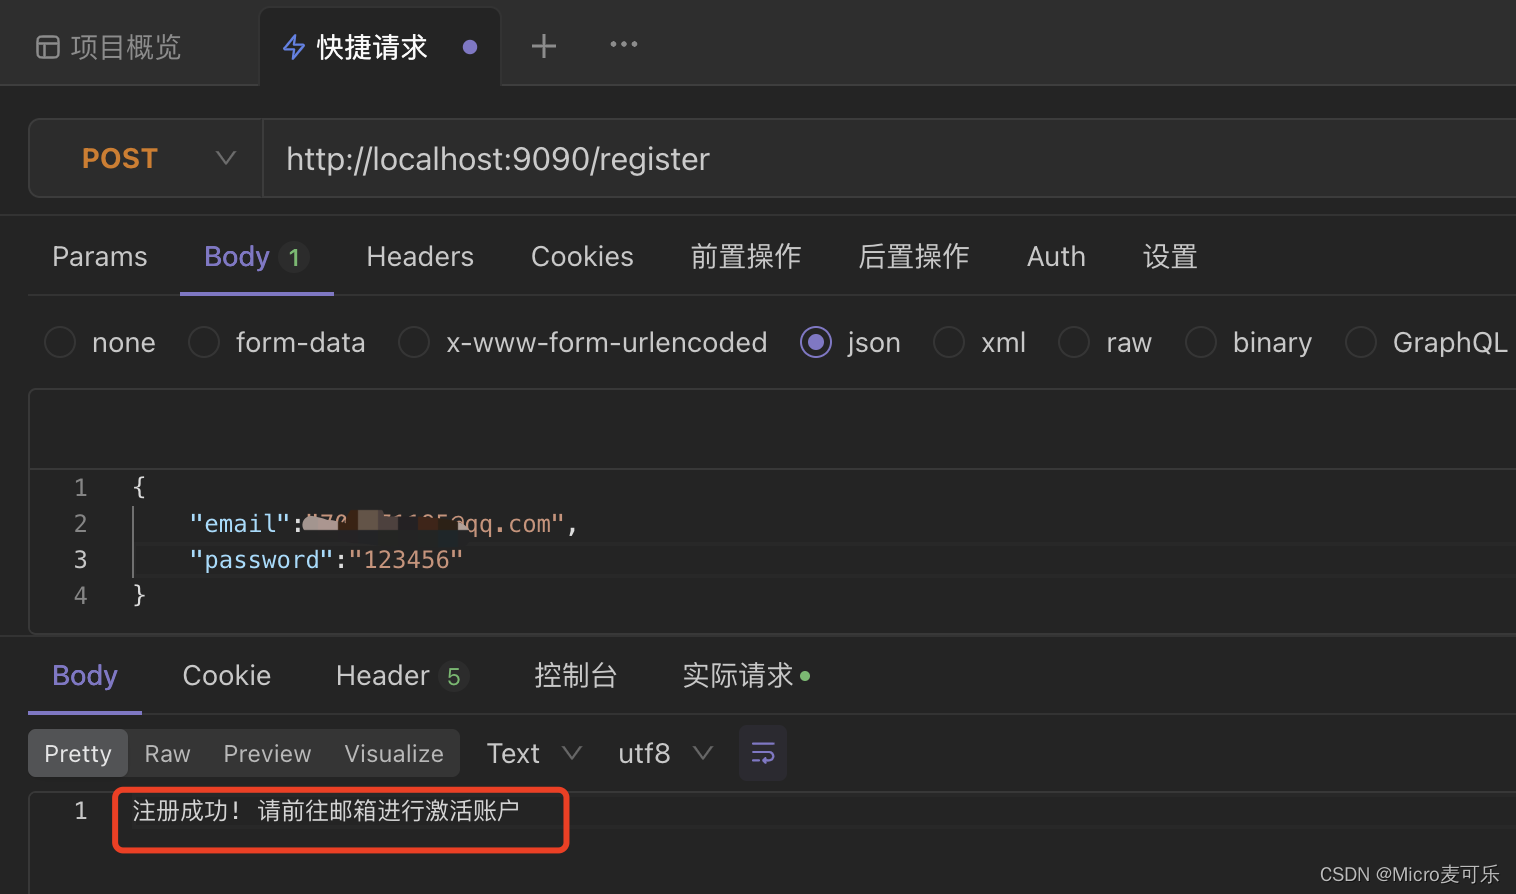
使用接口调试工具,如:Apifox、Postman 等,博主使用的是Apifox,请求注册接口传递注册用户JSON信息
登陆收件邮箱查看邮件信息
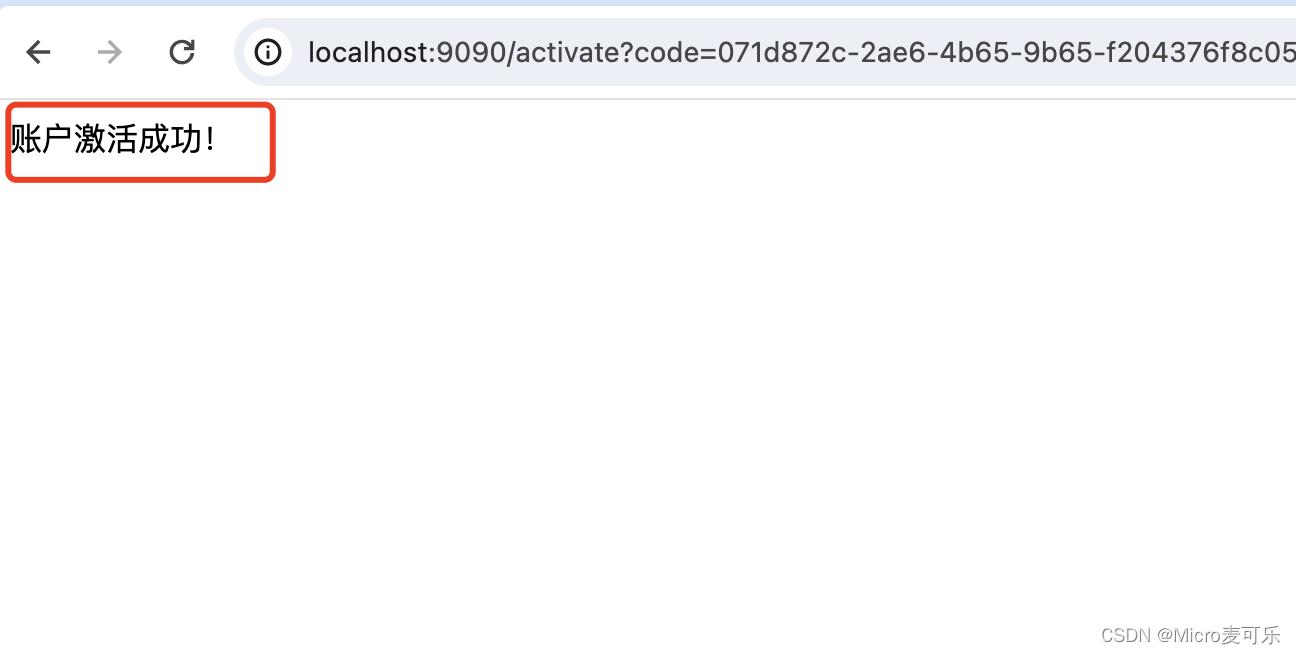
点击链接激活页面显示 账户激活成功 则代表我们已经完成了用户注册到激活的功能
结语
通过本篇内容,我们成功实现了一个基本的用户注册和邮件激活功能。这个流程不仅提升了应用的安全性,还增强了用户体验。小伙伴可以根据实际需求进一步扩展和优化,例如添加邮件模板、错误处理和更完善的用户管理功能。


![[工业自动化-1]:PLC架构与工作原理](https://img-blog.csdnimg.cn/ce10a1471ed14382bc58364cf8bd5209.png)


还没有评论,来说两句吧...